+++*

Symbolic Forest

A homage to loading screens.

Blog : Post Category : Dear Diary : Page 8

Yet another crafting project (part three)

Or, cross-stitching progresses

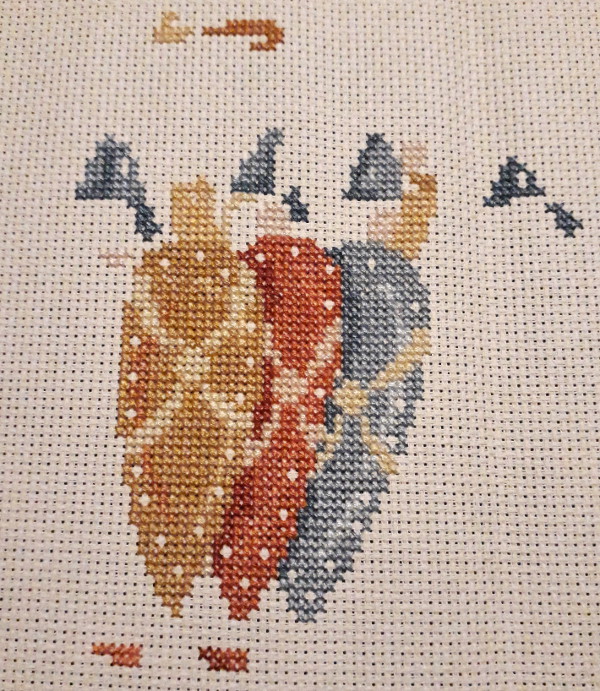
The post-house-move unpacking has reached the point now that most of the day-to-day things are all unpacked and sorted out. That doesn’t include all of the various bits of hobby equipment, but it does include the cross-stitch project that I’ve posted about a couple of times previously. Indeed, this weekend I reached the point that all of the cross-stitching itself was done.

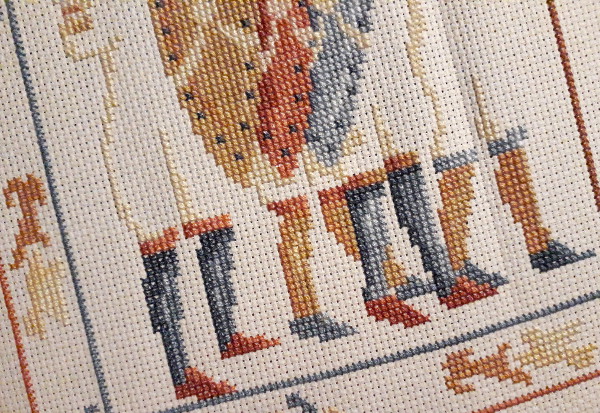
Cross-stitching done

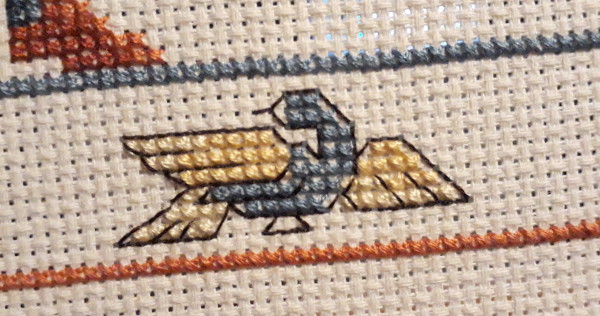
Hopefully you can tell what is it now: a group of Norman soldiers in the style of the Bayeaux Tapestry. If the pattern still looks a bit sketchy and incomplete in parts, that’s because this kit also includes a rather large amount of backstitch, particularly backstitched chain mail. We could be here some time. Still, I’ve made a start at least.

Some backstitched detail

So far it looks a bit neater than I was worried it might.

The other posts in this series are *part one*, *part two* and *part four*.

Photo post of the week

Ger y camlas

One aspect of moving house, especially if you move to a completely different neighbourhood or another town altogether, is the joy you can have in exploring the new area, finding all the interesting corners and places to go. In the current hospitals-overflowing stay-at-home situation, this is a bit limited; but at least there is exploration that can still be done on foot. In Bristol I was getting rather jaded of all the places I could visit on foot, even when it led to interesting local history blog posts. Now, there’s a whole new set of avenues of local history to explore.

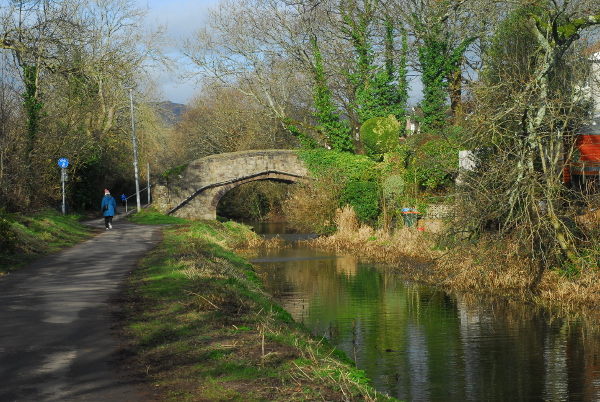
One of the spots I can reach on foot is a quiet, sleepy canal backwater. You can’t even use it as a canal any more; most of the road bridges have been demolished or flattened out (or are roads that didn’t even exist when the canal was in use), so you can’t get any sort of boat under them. It’s essentially a long pond, busy with ducks and moorhens, and with its towpath busy with walkers.

Along the canal

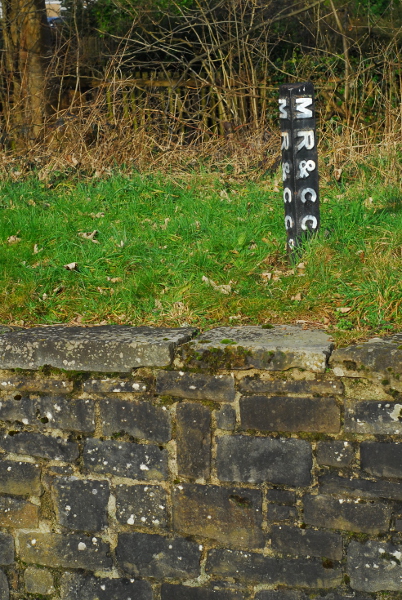
Along the canalbank there are a few surviving hints of its industrial archaeology. Here, for example, is a mid-19th-century boundary post.

Canal boundary

This post must be from some decades after the canal was built, because “MR&CC” is the Monmouthshire Railway & Canal Company; and the canal company only added “Railway” into its name in the 1850s. The canal—the Crumlin arm of the Monmouthshire Canal—was built in the 1790s, but within 10 years of its opening some of its main users were looking to replace it with a railway. Not wanting to lose revenue, the canal company agreed to split the railway* midway: the lower half was built by the canal company and the upper by the owners of the Tredegar ironworks, with the dividing line at the nine-mile mark eventually becoming the village of Nine Mile Point. At opening in around 1805, the combined system was the longest railway network in the world, and quite a few stretches of the route are still in use now.

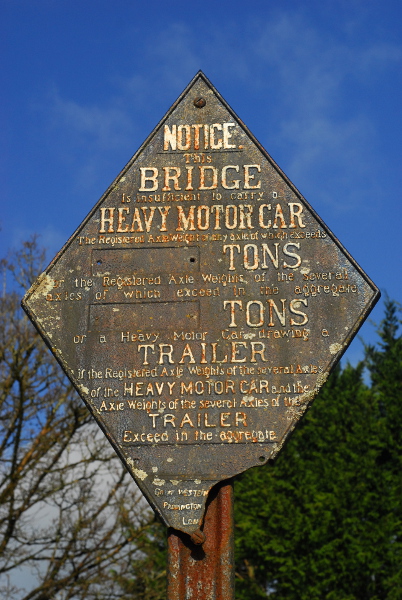
Later on, the split at Nine Mile Point was preserved. The upper section, the Sirhowy Railway, was bought by the London & North Western Railway. The canal company, though, was bought by the Great Western Railway, and some of their signage survives along the canal bank too.

GWR sign

This is a standard design of weight restriction sign—there are other GWR examples along other GWR-owned canals, and the North Yorkshire Moors Railway has a North Eastern Railway one.

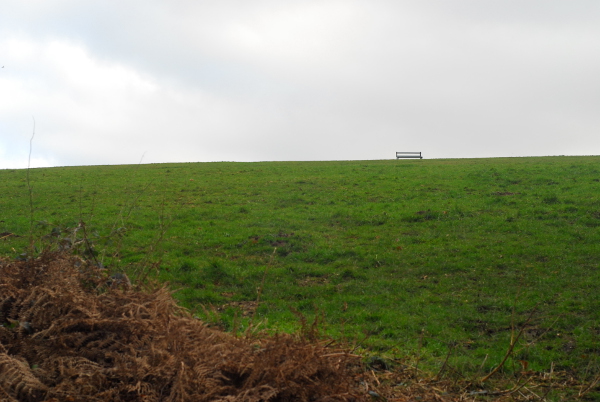
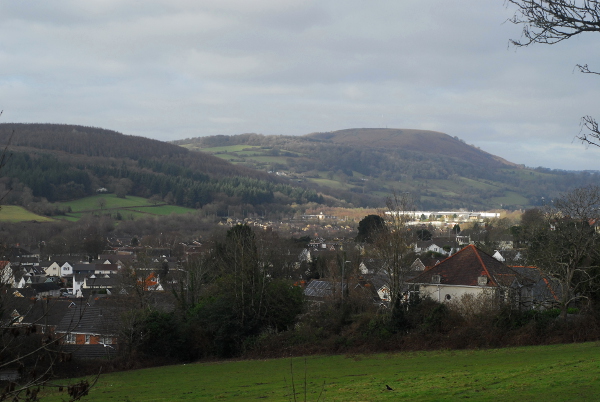
No doubt I will have a lot more to say about local history in the future. As yet I’m not even sure what questions I want to ask, let alone have started to investigate the answers. At least when I do, though, I’ll be able to enjoy the scenery as I go. Even when I can only explore places I can reach on foot, there is still an awful lot to sit down and look at.

Bench

Mynydd Machen

* A quick terminology note: I’ve used the word “railway” in something of a blanket way here. The railways I’m talking about were built as what are now called “plateways”, with flanged track and unflanged wheels. At the time, in South Wales, they were generally (but not always) called “tramways” or “tramroads”.

See you later, alligator (part two)

In which something, for once, is completed

The bad thing about Lego is that if you’re just going to build the kit out of the box, it costs quite a lot of money compared to the time it takes to build the thing. The good thing about Lego, though, is that you can actually complete a project in a reasonable amount of time. Regular readers of this blog will be aware just how many half-finished craft projects I post about on here, and just how few completely finished ones there are (um, none). The Lego I posted about last week, by comparison, is already done! After three sessions, the kit is complete. I’m still not entirely sure why it merited an “18+” age guidance on the box, but it certainly did include lots of fiddly bits.

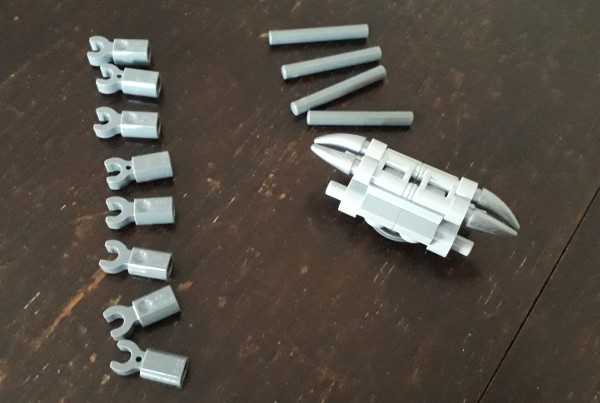
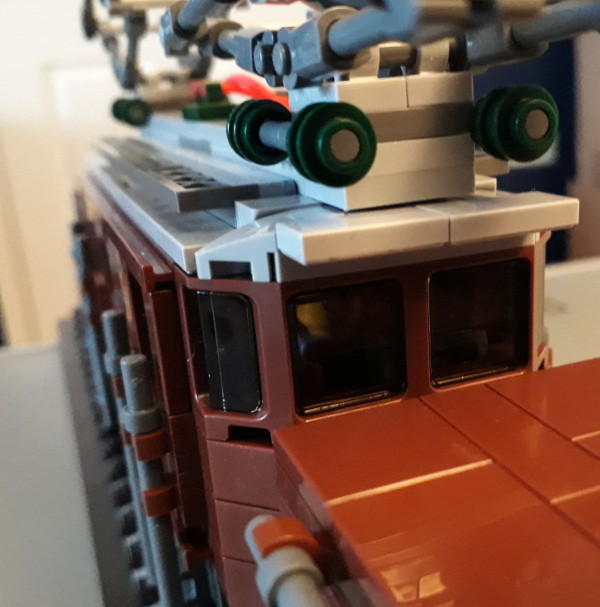
Pantograph parts

The ends of the pantograph collectors, incidentally are the same Lego element used for the claws of various dinosaur and other animal kits, but in silver.

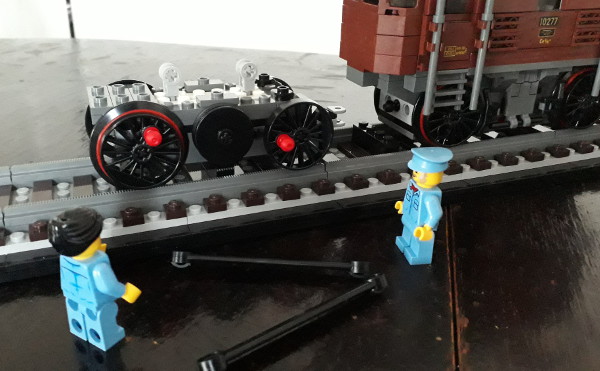
Whenever I do Lego, I like to take lots of step-by-step photos, so it’s always very tempting to start posing the minifigs in positions to suit. I’m not sure they knew how to fit a connecting rod, although Lego rods do make wheel quartering extremely straightforward.

Putting the rods on

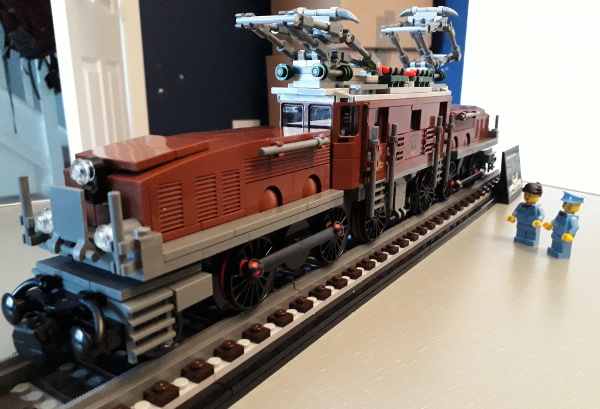
By now the Lego aficionados will have realised that this is the “Swiss Crocodile Locomotive” set slowly coming together. I don’t have any Lego track easily accessible right now, so I didn’t see any point getting the motor to go along with it; but I would imagine it is always going to be more of a display piece than a usable locomotive. Two flangeless pairs of wheels always seem to ride slightly off the rails, making its wheel arrangement a 1-1-B-1-1 or thereabouts. Still, I think it’s going to be quite a nice display piece for the office, when I have all the furniture in the office sorted out.

At some point I'll do a proper photo without random junk in the background

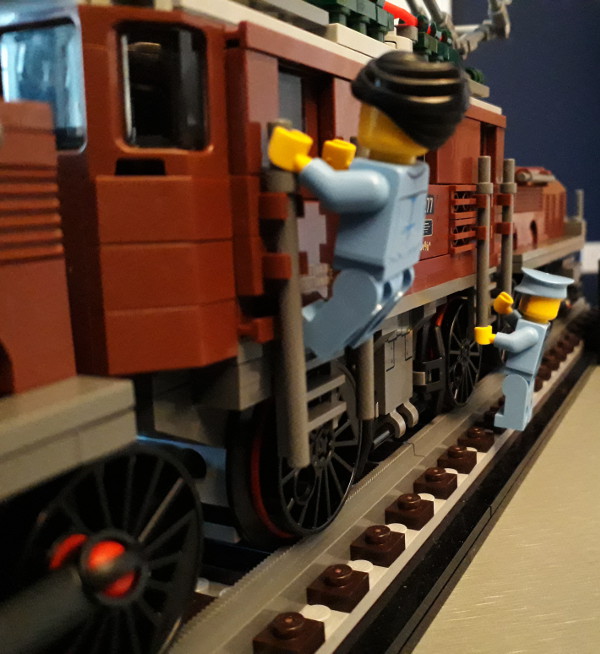
Even if I don’t have anywhere to put it properly yet, and even if it is only for display, the minifigs wanted to climb aboard as soon as it was complete.

Climbing aboard

In the cab

The hardest thing about building this model? Probably the design of the instruction book. A kit with a lot of brown or dark brown parts, with instructions printed on a black background, is not the easiest read. Still, I didn’t really go too far astray at any point in the build.

Will this lead to more craft projects suddenly being finished? Will there suddenly be a flood of completed work? Well, stranger things have happened. I certainly shouldn’t start any more until there are fewer in progress, certainly.

See you later, alligator

Or, a treat for myself

It’s strange, having a birthday that falls not long after Christmas. For a while now I’ve been past the age of receiving very many birthday presents, so a while ago I deliberately went out and bought myself a present, and put it away, waiting for my birthday. This year, too, my birthday was relatively close to moving house, the strange period in which everything frivolous, everything not house-move-related, has to go into stasis until the move is over. My present to myself was a Lego kit, and last night I was finally able to start to build it.

Last time I built some Lego I turned it into a GIF. This time, I was tempted to go the whole hog, set up camera and tripod and lighting, program the camera into time lapse mode, and create a video of the whole thing. It seemed like an awful lot of effort, though, for something that was supposed to be a treat for myself. Maybe after I’ve finished the model once, I’ll take it all apart, set up a time lapse, and build it again. Still, I did take a few photos. This is the end of Step 1.

Not much to show yet

It’s a bit hard to tell what it’s going to be after just one step, I suppose. I didn’t get the whole thing finished in one night, but I suspect this is going to be completed much faster than most of my craft-type projects.

Look, cogs

A bit clearer what it is

I do rather like the level of interior detail in this thing, even though a lot of it is likely to be hardly visible in the finished model. At present, it will just turn into something to sit on a shelf as an ornament in my office, but you never know, I might buy a motor to go with it at some point.

It's got controls and everything

*The second part of this Lego build is here*

Photo post of the week

Or, a change of scenery

Regular readers might have noticed that the site has been quiet since the weekend. It’s been quiet because I’ve been somewhat busy moving house: one of the most stressful things you can do in life, or so everyone always says. The previous post was written whilst I was surrounded by removal men trying to pack everything up into well-padded boxes. A strange experience, sitting in a corner of your front room trying to keep yourself occupied as all around you all your stuff is picked up and handled and wrapped and boxed away.

So now, the move is complete, the furniture is rearranged and at least some of the stuff is unpacked again. Everything is still a little bit topsy-turvy, though. Unpacking, I found books I thought I’d got rid of years ago; it turns out they were lurking in the cupboard under the stairs all along.

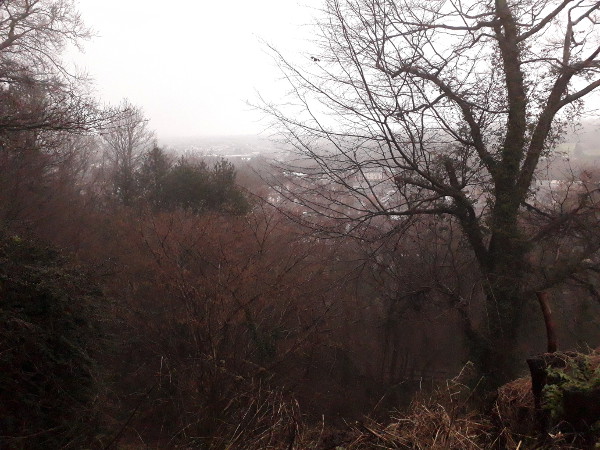
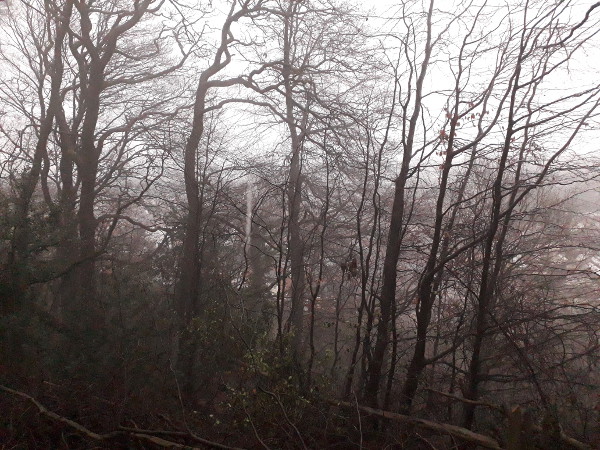
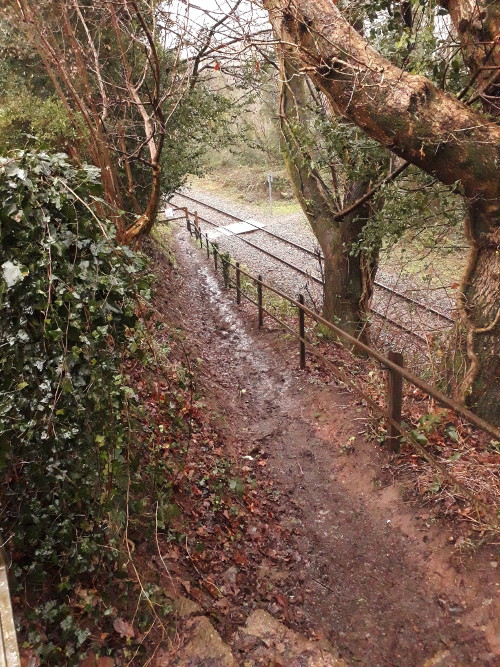
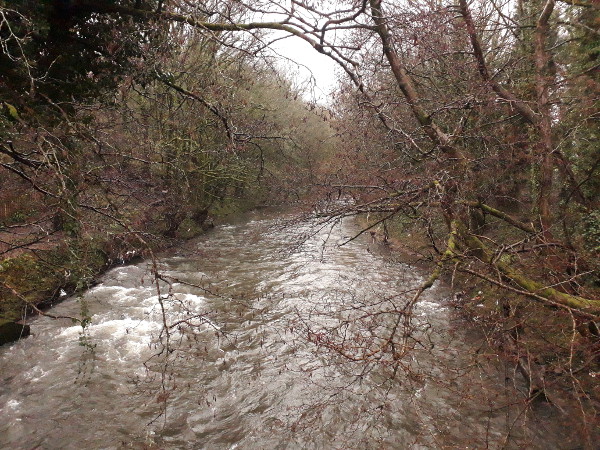
The full story of the move will have to wait until another day, partly because I have little energy at the moment for writing it down. Today, though, I did have enough energy to go for a wander in the new neighbourhood. It was pouring with rain, and after taking a few photos my phone screen became so wet it didn’t really respond to touches any more; but here are a few.

View from a hilltop

View from a hilltop

Level-ish crossing

Fast river

Snow day photos of the week

It didn't last long

When the weather forecast says there’s going to be snow I’m always slightly cynical. For one thing, I’m suspicious the forecast always errs on the side of caution when it comes to snow. Secondly, in this part of town, snow falls less and sticks less than on the higher ground of high-altitude suburbs like Clifton and Horfield. In Easton, the snow is rare and quickly turns to slush.

I was slightly surprised, then, when there was about an inch of lying snow when we got up this morning. Given it was fairly surely going to be half-melted by lunchtime, the only thing to do was to head outside straight away.

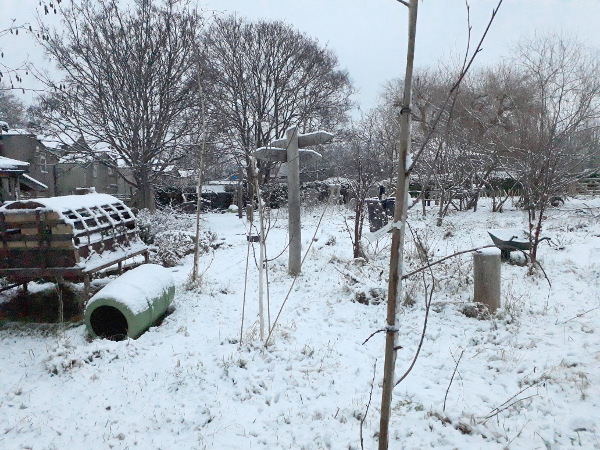
Snowy school field

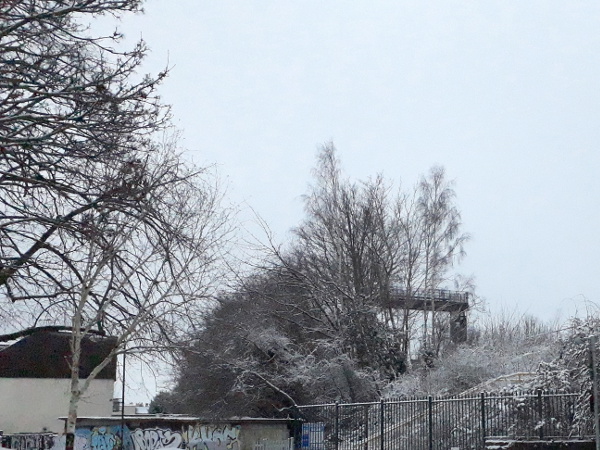
Snowy railway embankment

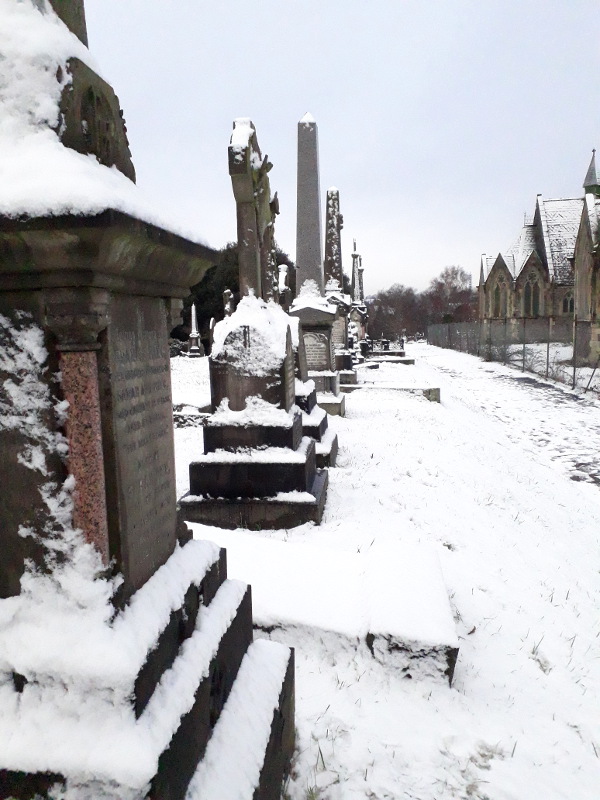
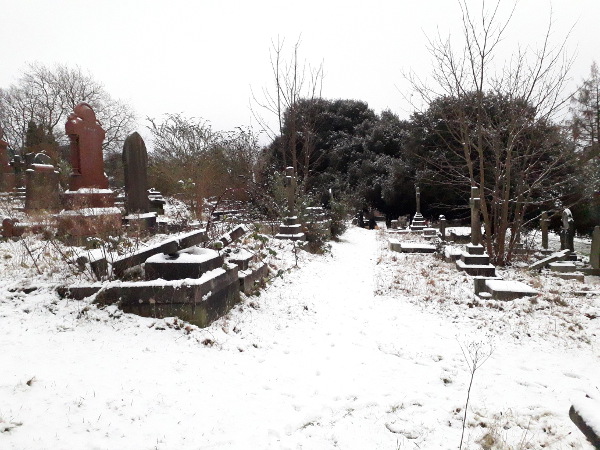
We headed to a spot that will be very familiar to regular readers: Greenbank Cemetery. Although we were an hour or so before the official opening time, the cemetery was already busy with people who had sneaked through the many, many gaps in the fence. The slopes near the gates were bigger with sledgers, so we headed to the quieter parts where the snows were deeper.

Snowy cemetery

Snowy cemetery

Snowy cemetery

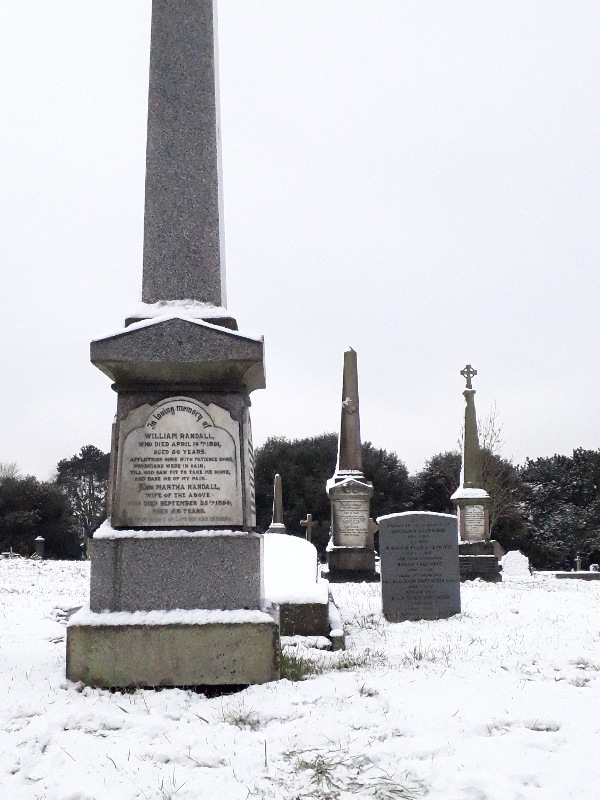
I was quite taken by this piece of Victorian doggerel that I’ve never noticed in the cemetery before.

This is a terrible poem

In loving memory of William Randall, who died April 14th 1891, aged 56 years.

Afflictions sore with patience bore,
Physicians were in vain,
Till God saw fit to take me home,
And ease me of my pain.

Also Martha Randall, wife of the above, who died September 25th 1894, aged 58 years.

There wasn’t space for an equally awful poem for Martha as well; or for their children, commemorated around the other side.

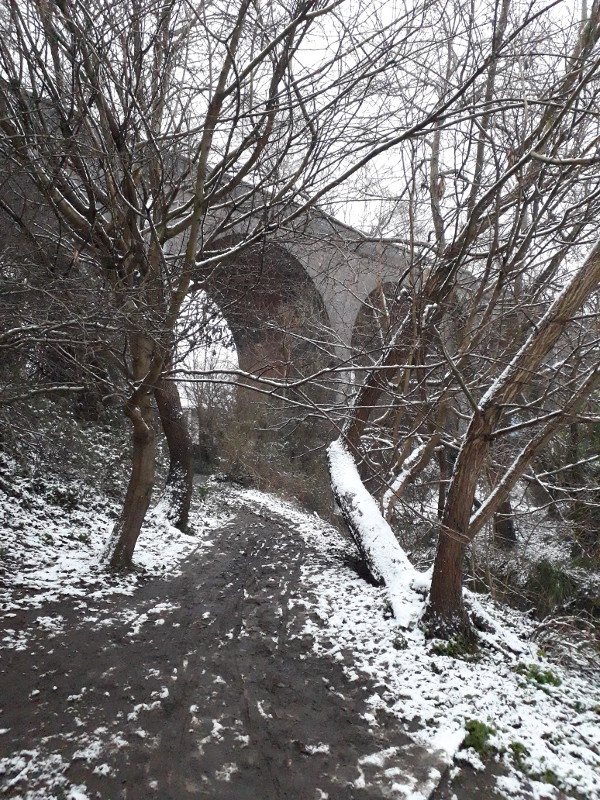
Beside the cemetery, the nature reserve under the disused Midland Railway viaduct was a bit of a muddy slough. All around us the snow was melting, dripping constantly from the trees.

Nature reserve and railway viaduct

We returned home via the area’s other prime sledging spot, Rosemary Green, a part of town that I’ve been intending to write about here for a while, although in recent years its history has been thoroughly documented by the Bristol Radical History Group, culminating in the book *100 Fishponds Road: Life and Death in a Victorian Workhouse* by Ball, Parkin and Mills. To cut a long story short (if you want the full story go and buy the book): to avoid increasing the council tax poor rate, the board of Eastville Workhouse thought they would save money on funerals by buying a piece of waste ground behind the workhouse, paying the Church of England’s somewhat exorbitant consecration fee, and packing dead residents into mass graves without having to pay for coffins, priests, artisanal gravediggers and the like. Through the second half of the 19th century, probably around 4,000 poor people were buried unmarked in the mass grave. About fifty years ago the workhouse was knocked down to build a housing estate. As the Church disclaimed all responsibility, the bodies were dug up by bulldozer, and the larger bones were pulled out and reburied in a second unmarked mass grave in Avonview Cemetery. The soil and the smaller bones were spread out across the site. Today, Rosemary Green is a pretty and quiet little piece of green space, grass sloping steeply down from the housing estate to a small football pitch at the bottom; but if you were to dig a hole there, you would find the soil is full of small fragments of crushed human bone from thousands of different people.

Today, of course, it was busy with sledging children and snowmen; but it was barely mid-morning and almost all the snow had already been sledged away. By the time we got home, the sound of trickling water in every gutter and drain filled the streets. Mid-afternoon, as I write this, the snow has gone with barely a sign it was here. At least I can share these photos.

Yet another crafting project (part two)

Things slowly take shape

There are lots of ideas I’ve had for things to write on this blog, that are slowly building up, and that I haven’t written about—in fact, I’ve added two more whilst drafting this paragraph in my head. They all involve lots of effort, though, lots of planning and drafting and assembling ideas; and right now all my energy is being taken up by work and by various other things. So when I sit down in an evening, I don’t have enough process space left in my head to write anything in-depth on here. Instead, I’ve just been getting out the cross-stitch project I wrote about last week, because it’s nice and easy to get it out of its back and sit on the sofa methodically counting and sewing and counting and sewing.

Last time, I said I’d let you guess what it might be, when it was basically nothing more than a blue banana shape. Now, if you ask me, I think it’s much much more obvious.

Now that has to be a bit clearer than before

However, I’ve spent hours poring carefully over the pattern that came in the kit, planning which part to work on next and double-checking I’ve put all the stitches in the right place. To me, it’s inconceivable anyone wouldn’t be able to recognise what it is, but I’m rather biased.

The other posts in this series are *part one*, *part three* and *part four*.

Photo post of the week

Or, the local neighbourhood

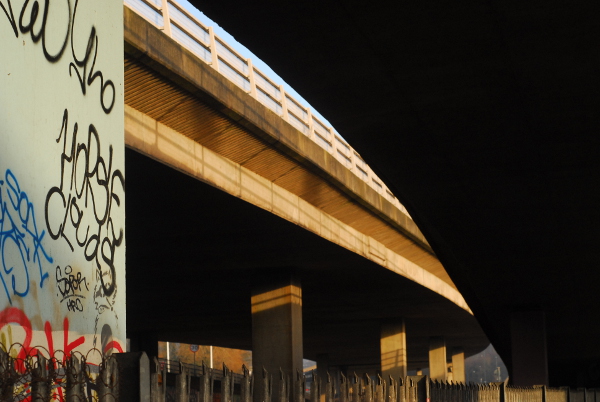
The combination of being back at work, and the ongoing pandemic situation (particular disastrous in this misgoverned country) means that photography at the moment is limited to things we can photograph whilst walking-for-exercise (if it was walking-for-fun it would be strictly forbidden, of course). Luckily, there are enough interesting views within walking distance that it doesn’t have to be a completely fallow period. Last weekend, when it was cold, I took the camera out and have already posted here the photos I took of Ridgeway Park Cemetery. However, as it was such a cold and icy day, there were plenty of others too. Being an inner city area, we naturally have dystopian motorway overpasses…

M32 viaduct over the River Frome

However, there’s also the wide open spaces of Eastville Park.

Eastville Park

Eastville Park

The park’s pond had frozen and refrozen a few times over the preceding days, and The Children enjoyed seeing how far sticks would slide across the surface of the ice.

Frozen pond

The river, though, was unusually clear. We stood a while by Stapleton Weir and watched the river water foaming over the edge.

Stapleton Weir

All in all, it’s not too bad an area to live in.

Yet another crafting project (part one)

Some more cross-stitch

Attentive regular readers might remember that in the lead-up to Yuletide, our office held a Christmas Craftalong, in which everyone who was interested got together in a remote meeting and did the same small cross-stitch kit together. After I’d finished it, I said:

Will I go on to do more cross-stitch? Well, it was a fun way to spend a few evenings. Maybe if I can find some more kits that aren’t irredeemably twee, I might do.

It didn’t take me long, really, before I was on the internet searching for cross-stitch kits or just patterns that I’d be happy to put up on the wall when finished. However, a few weeks later, everything has arrived and I’ve been able to make a start.

The start of some more cross-stitch

I won’t say what it is for now, although you’re welcome to try and guess. The design, when it arrived, suddenly looked much bigger than it did on-screen, so this might take me a little bit longer to finish than the Christmas robin did.

The other posts in this series are *part two*, *part three* and *part four*.

Just like clockwork (part one)

Time for a building project

Back in the mists of time on Boxing Day, I posted a clue as to what one of my Christmas presents was. A model tram from UGears, which I have been slowly assembling since.

It’s been a fun project, but I’m not completely sure it lives up to the promise on their website that “no glue, special expertise, tools or equipment are required”. With a fair wind and if everything goes well, then maybe. When I opened the box, the kit consisted of:

  • Various laser-cut plywood sheets.
  • Two rubber bands.
  • A small square of fine sandpaper.
  • A number of cocktail sticks, individually wrapped.
  • A glossy and comprehensive instruction book.

The instruction book is very good and very clear, with each step being shown as a 3D-rendered diagram. However, it starts off listing the extra pieces of equipment you need which aren’t supplied:

  • Candle wax, to lubricate the moving parts.
  • A knife, to cut some of the cocktail sticks to length.

With those to hand, you start off by assembling various gear shafts. Each of these assemblies consists of the gears themselves, four wooden wedges that are inserted through the gear centres, and a cocktail stick that has to be squeezed through a small hole left right in the middle where the four wedges meet.

The first gear shafts

These are the first ones in the instructions; gears, but also the main “wheels” that the tram sits on. The instructions say the cocktail stick should be inserted symmetrically, with the same length protruding from each end, so it’s very helpful to have a small steel rule to assist with doing it by eye. If the “axle” isn’t symmetrical, a measuring tool is included in the kit to indicate how much the stick should project from one end.

Inserting the cocktail sticks was the first big hurdle. Making the kit in the advised way—assemble the wedges into the gears then slide the cocktail stick down the middle—is very hard to do without accidentally blunting the sharp points at the ends. Unless you’re dealing with one of the gear shafts which needs one or both ends trimming short, this is a problem, because it’s very easy to blunt the sticks to the extent they won’t work any more. I found for most it was easier to assemble the shafts in a slightly different order: take one gear, insert the wedge pieces and the cocktail stick into that gear alone, then squeeze the wedges together at the other end and slide the other gear over the wedges’ clip-shaped ends.

The tolerances of the cocktail sticks don’t help, either. Some parts require sticks to be inserted into holes in the plywood parts, and these are all supposedly a push fit. What quickly became clear is that the cocktail sticks are made to rather looser tolerances than the laser-cut parts: some sticks will be a reasonable push-fit in the holes, and some will have no chance of going in. With these parts, I ended up picking which stick I was going to use, then opening out the hole with a broach to fit. If I went a bit too far and made it a sliding fit, I used a little dab of Resin W to glue the stick in place.

The parts for a pawl

You can see this under way with these parts for the pawl which holds the “rubber band shaft” tight after it’s been wound. You can also see that here I’m reusing a cocktail stick whose end I have already wrecked, in a position where it will be trimmed off short. As the lowest of the three holes in each pawl piece is rather close to the edge, I found one of the narrower sticks in the kit for that position, so it wouldn’t need opening out at all. You can clearly see the different widths of the supplied cocktail sticks, and on the right-hand pawl piece you can see how much I’ve had to open out the uppermost hole, compared to the unmodified bottom hole, in order for the fat stick at the top to be a push fit into it. Using a broach for this, it’s easy to roughly remember how much of the broach’s cutting length is needed to get the hole to around the right width before you start testing for fit.

Assembled pawl awaiting trimming

Once the parts were pushed onto the sticks, the ends of two could be trimmed off, leaving a single shaft for it to pivot on.

Completed pawl

Building all the various gears and related parts took quite a few hours, so it was rather pleasing how easily the main framework of the tram fitted together, and how straightforward it was to slip the ends of each shaft into their appropriate hole in the frames. It was rather pleasing, too, to find how well the initial gear chain rotated. It links the wheels together, and also includes a shaft which seems to be in there purely to make a clicking noise.

You might notice that the pawl from the previous photos hasn’t been fitted to the main assembly yet. That comes later, and was a little bit more fiddly. We’ll come on to that another time.

To be continued.